Client Area Popup For WHMCS
Contents |
About Client Area Popup For WHMCS
| Client Area Popup For WHMCS is a module that lets you create fully customized pop-ups that will be visible to your clients in their panel. Prepare a ready pop-up in a form of an image, raw or HTML text to pass a message directly to your clients. Design it using predefined styles, which can be always altered and upgraded to implement your idea perfectly. |
- Admin Area Features:
| ✔ Create Informative And Advertisement Pop-Ups |
| ✔ Compose Pop-ups Using Predefined Styles |
| ✔ Preview Pop-up With Single Click |
| ✔ Archive Pop-ups For Later Use |
| ✔ View Pop-up Restrictions |
| ✔ View Number of Pop-up Displays |
| ✔ View Pop-up Delay Time |
| ✔ View Pop-up Status |
| ✔ Create Styles To Be Used By Pop-up |
| ✔ Preview Style With Single Click |
- Client Area Features:
| ✔ View Pop-up If Restrictions Are Met |
| ✔ Close Pop-up Permanently |
- Pop-up:
| ✔ Define Pop-up Restrictions: |
| ✔ Display Frequency - How Often Pop-up Should Be Displayed |
| ✔ Hide - Client Can Close Pop-up Permanently |
| ✔ Not Logged In Users - Display Pop-up To Guests Only |
| ✔ Pages - Define Pages Where Pop-up Is Displayed |
| ✔ Days - Specify Days Of The Week When Pop-up Is Displayed |
| ✔ Required Languages |
| ✔ Required User Groups |
| ✔ Required Active Products |
| ✔ Required Active Products In Groups |
| ✔ Required Active Products With Servers |
| ✔ Required Active Addons |
| ✔ Required Active Domains With Chosen TLDs |
| ✔ Lack Of Chosen Active Products |
| ✔ Lack Of Chosen Active Addons |
| ✔ Lack Of Active Domains With Chosen TLDs |
| ✔ Define Due Date Restrictions: |
| ✔ Display Pop-up Before, After And On Service Due Date |
| ✔ Specify Conditions With 'Less Than', 'Equal To' And 'Greater Than' Options |
| ✔ Define Number Of Days Applied To Condition |
| ✔ Specify Active Services |
| ✔ Specify Services' Status |
| ✔ Define Timing: |
| ✔ Date Frames - Start And End Date For Pop-up To Be Displayed |
| ✔ Time Ranges - Hours Interval When Pop-up Is Displayed |
| ✔ Delay Time - After How Many Seconds Pop-up Is Displayed |
| ✔ Define Pop-up Size |
| ✔ Assign Style To Pop-up |
| ✔ Choose Type And Provide Pop-up Content: |
| ✔ Text With WYSIWYG Editor |
| ✔ Raw HTML |
| ✔ Image |
| ✔ Auto-synchronize Pop-up Status Basing On Start And End Date |
- General Info:
| ✔ Supports Default And Custom WHMCS Templates |
| ✔ Multi-Language Support |
| ✔ Supports PHP 5.6 Up To PHP 7.3 |
| ✔ Supports WHMCS V7.5 And Later |
| ✔ Easy Module Upgrade To Open Source Version |
Installation
| This tutorial will show you how to successfully install and configure Client Area Popup For WHMCS. We will guide you step by step through the whole installation and configuration process. |
| 1. Log in to our client area and download the module. |

|
| 2. In the downloaded file you might find one or two packages that support different PHP versions. In the most recent versions of the module, you will find only one package that supports PHP 7.1 and later. |
| Previous updates of the module may contain two packages dedicated to various PHP versions. The first one that supports PHP 5.6 up to PHP 7.0, and the second one addressed to PHP 7.1 up to PHP 7.3. |

|
| Important: This situation does not affect the open source version of this module which can be applied to any PHP from version 5.6 and later. Note: You can check the current PHP version in your WHMCS. To do so, proceed to 'Utilities' → 'System' → 'PHP Info'. |
| 3. Once you have chosen the package with the right PHP version, extract it and upload its content into the main WHMCS directory. The content of the chosen PHP version files to upload should look like this. |
| 4. When you install Client Area Popup For WHMCS for the first time you have to rename 'license_RENAME.php' file. File is located in 'modules/addons/PopupModule/license_RENAME.php'. Rename it from 'license_RENAME.php' to 'license.php'. |

|
| 5. In order to configure your license key, you have to edit the previously renamed 'license.php' file. Enter your license key between quotation marks as presented on the following screen. You can find your license key in our client area → 'My Products'. |

|
| 6. Set permissions to file: 'modules/addons/PopupModule/templates/clientarea/assets/popup' to '0777'. |
7. You will nedd to set up a cron job to assure automatic shifts of pop-ups' current statuses.
php -q your_whmcs/modules/addons/PopupModule/cron/cron.php Note that the above directory is exemplary, please adjust the cron line to your own needs. |
| 8. Now you have to activate the module in your WHMCS system. Log in to your WHMCS admin area. Go to 'Setup' → 'Addon Modules'. Afterwards, find 'Client Area Popup' and press 'Activate' button. |

|
| 9. In the next step you need to permit access to this module. To do so, click on 'Configure' button, tick 'Full Administrator' and press 'Save Changes'. |

|
| 10. You have just successfully installed Client Area Popup For WHMCS! You can access your module under 'Addons' → 'Client Area Popup'. |

|
Configuration and Management
| Client Area Popup For WHMCS is a module which allows you to notify your clients by showing them customized pop-ups directly in their panel. Below, you will find instructions on how to draft and customize such pop-ups. |
Configuration
| The module does not require advanced configuration. That is why, we will immediately move to the most crucial part, which is creating a pop-up. |
Create Pop-up
| To add a new pop-up simply press an appropriate button. |

|
General
| Start with naming the pop-up. Note: The title will not be displayed in any way on the final pop-up. |

|
| If you added any pop-ups in the past, you may copy their settings to the newly created one to save time. Next, select the initial status:
|

|
Look And Feel
The next part of creating a pop-up process concerns its interface, layout and general design.
Auto - it automatically adjusts to the content.
Select style from the list of available and previously defined styles. |

|
The pop-up may have a simple text form - select 'Text' and then format the text using the WYSIWYG editor. |

|
| Provide ready code snippet that you want to insert into the pop-up content. See the visualization here. |

|
| Upload an 'Image'. See the visualization here. |

|
Restrictions
| Restrictions - this is the place where a pop-up is conditioned. Please set up the rules according to which the pop-up will be displayed to clients. Only one restriction rule per group is required to show the pop-up. If you choose restrictions from multiple conditions then at least one rule in each group must be fulfilled to display the pup-up. |
|
For example: If you choose three products under 'Has Active Product' rule then the client needs to have only one of active products to see the pop-up. |
General options:
Conditions:
If any of the above options is left blank (except 'Days' condition), it will not be taken into consideration when creating a final list of clients to see the pop-up. |

|
| You will also find there an explanation of the checking process: |

|
Due Date Restrictions
| In this section you may add restrictions basing on a selected service due date. For example, if a due date of selected products/addons/domain for any of your clients is coming, you may create a popup that will appear a given number of days before the due date. |

|
Select types:
Then, select required conditions, you may choose more than one, they will be applied to the selected later on number.
Finally, type in the number basing on which a number of days to show the pop-up will be calculated. |

|
| Next, you will need to choose which of the active services or any services with the selected status will be checked. |

|
| As presented above, the pop-up will appear for clients who have active 'Test Product' and its due date is about to come. The pop-up will be displayed for 10 days before the due date and on the due date. |
Timing
| In the last section, you can define the time period within which the pop-up is active - in other words, when it will be displayed with the set up previously frequency. Choose a specific day and hour to schedule the pop-up activation or select option 'Immediately' - then the pop-up will be active once you have saved the changes. |

|
| You may also specifiy exact time frames to show the pop-up, for example since 8 a.m. to 4 p.m. Keep in mind that this is the server time used here. The last option is 'Delay Time' - if you enter here any value, then the pop-up will appear on the reqired page once mentioned here number of seconds has passed, |

|
Pop-ups
| The first and main section of the module is called 'Pop-ups'. You will find there all the most important information on existing pop-ups together with any possible action that can be taken on them. |

|
Actions
|
1. Preview the pop-up - a sample page with a visible pop-up will appear. This is the final look a client receives. |

|
Types
There are three types of pop-ups in the system:
|

|
| Inactive pop-ups are those for which the end date has been exceeded and they are no longer displayed to clients. Just like in case of active pop-ups all actions are available. You may edit it to change the end date and at the same time activate it again. |

|
| Pop-ups in archive are moved there manually or automatically, if you have set up the cron job (see point 7 of installation instruction), these can be the previously active or inactive pop-ups.
You may restore archived pop-ups any time and, depending on the end date of the resorted pop-up, it will be moved either to 'Active' or 'Inactive' group. |

|
Styles
| 'Styles' section contains a list of all predefined styles that position your pop-ups. There are 26 types of different styles that vary from one another with up or down position, right/left/center, overlay option etc. |

|
| Before you start using any of the styles you can see their preview in the client area. See the visualization here. |

|
| If none of the predefined styles perfectly matches your needs, you may edit the styles. Press the icon as marked on the screen. |

|
| You are moved to the style edition page with CSS and HTML details. You may edit them if you need to adjust the style to your preferences. |

|
New Style
| In case the predefined styles are not sufficient and you do not want to lose any by editing its content, you may always add a new style. Press the button as on the screen to do so. |

|
| Provide your customized content or copy and modify a predefined style content. Subsequently save the changes. |

|
Documentation
| The last position in your navigation menu, when pressed, redirects to the article you are currently reading. |

|
Visualizations
| Now, let's take a look what Client Area Popup For WHMCS may give you in practice. Underneath, you will find several examples of pup-ups, each in a different style and of a different type. |
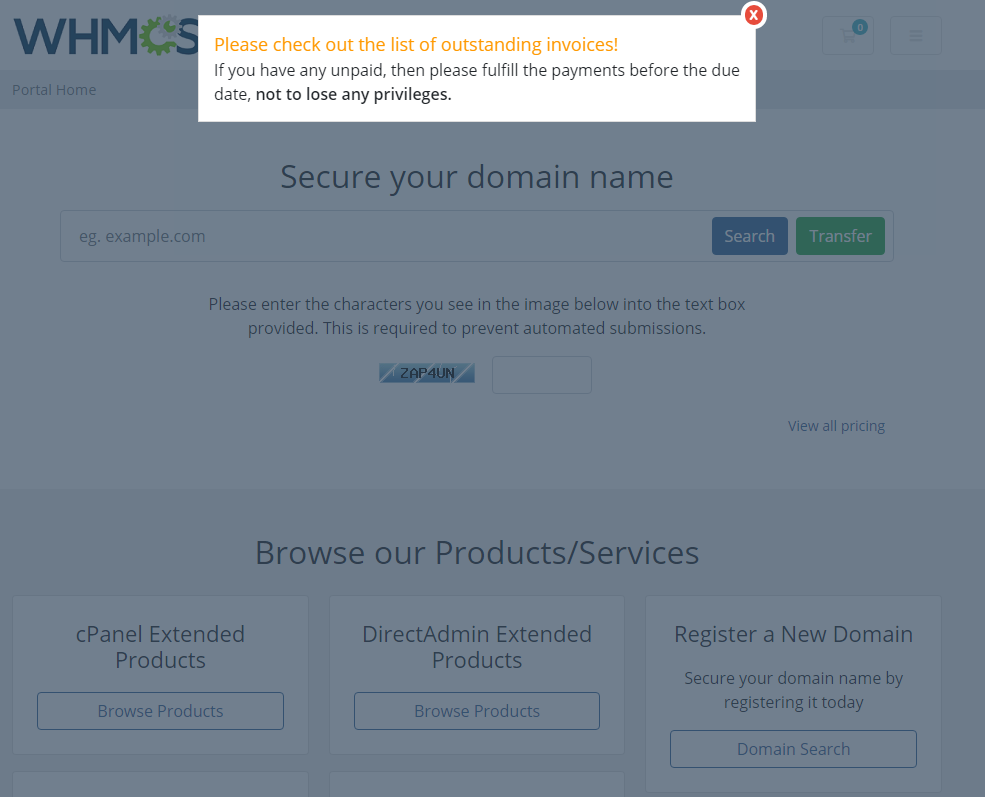
| Type: 'Text' Style: 'left_up' |

|
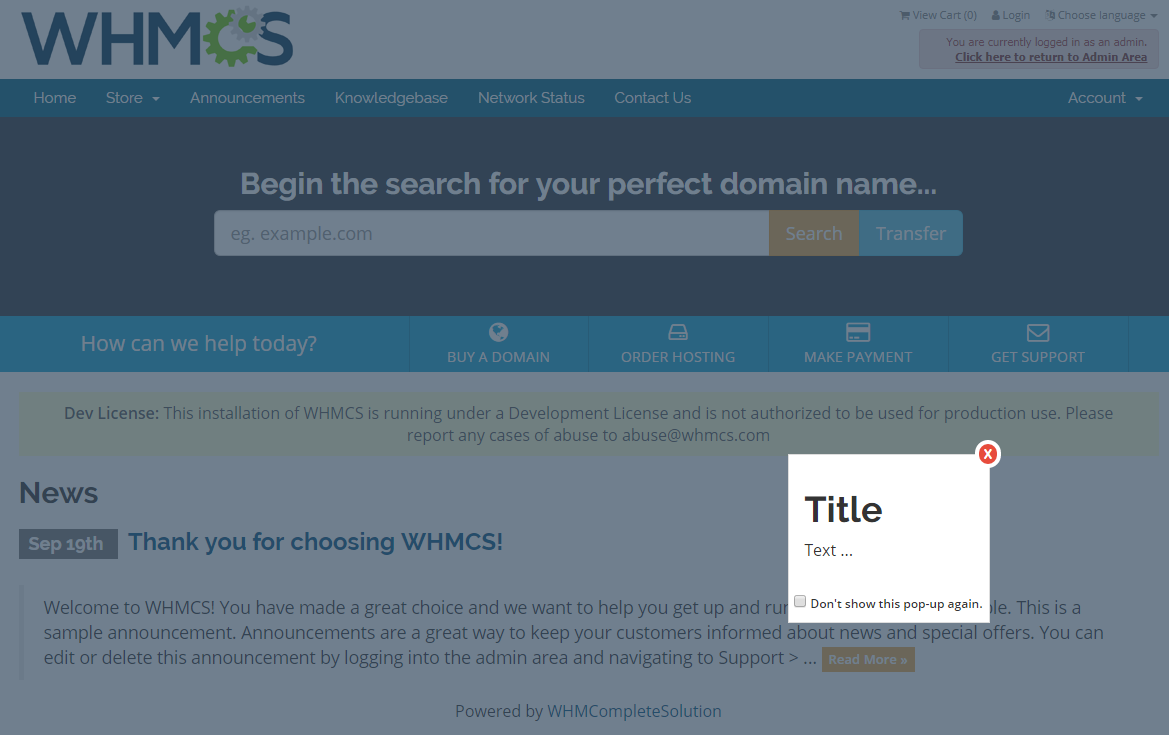
| Type: 'Text' Style: 'center_overlay' 'Overlay' means there is a gray background behind the pop-up text or image. |

|
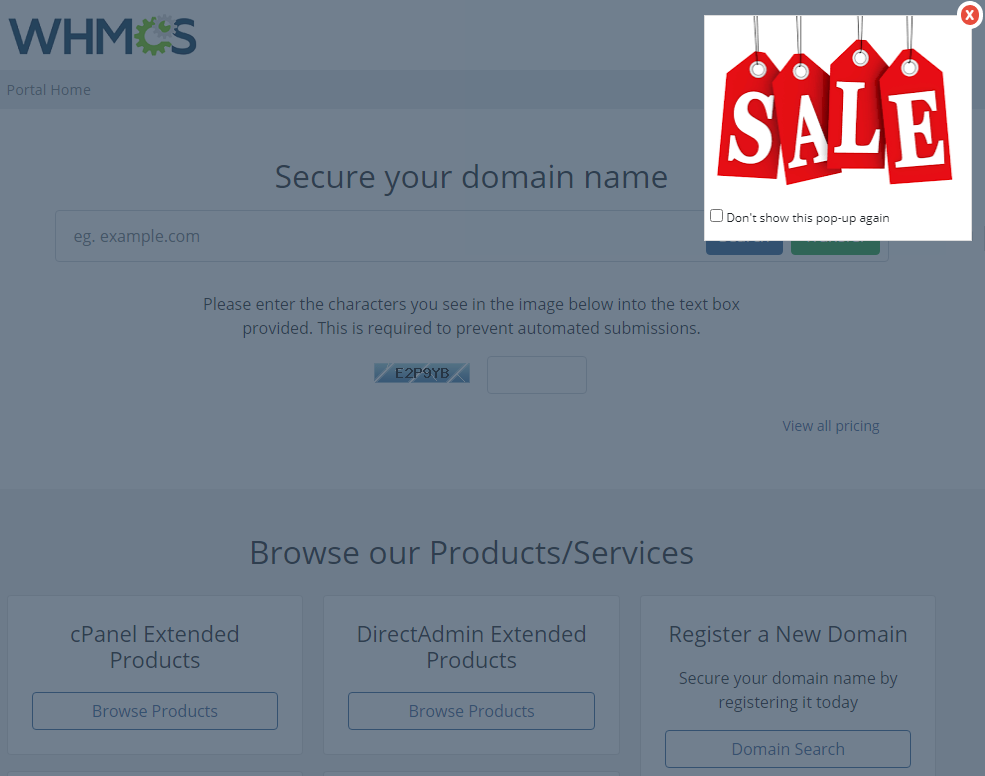
| Type: 'Image', Style: 'center' |

|
| Type: 'Image', Style: 'right_overlay_up' |

|
Tips
| 1. For your comfort, 'HTML' type of pop-up content supports also 'JavaScript' to let you provide your preferable content. |
| 2. The module is ad blocker resistant unless your clients block the popup class deliberately in the tool. |
Update Instructions
| Essential guidance through the process of updating the module is offered here. Keep in mind there is a quick and easy option in our client area that will let you upgrade the license of your module to an open source version at any time - and at a lower price! |
Common Problems
| 1. In case of connection problems, please check whether your SELinux or firewall does not block ports. |
| 2. If you encounter an error like on the screen below, please make sure you have successfully completed step 6 of the installation instructions. |

|
| 3. If you have problems with your license, please make sure that the content of the file is correct. Please note that for Client Area Popup For WHMCS V1.0.1 and later the license key begins with: $client_area_popup_licensekey="ModulesGarden_ClientAreaPopup_W_XXXXXXXXXXXX"; Not as it was for the previous version: $popup_module_licensekey="ModulesGarden_ClientAreaPopup_W_XXXXXXXXXXXX"; |